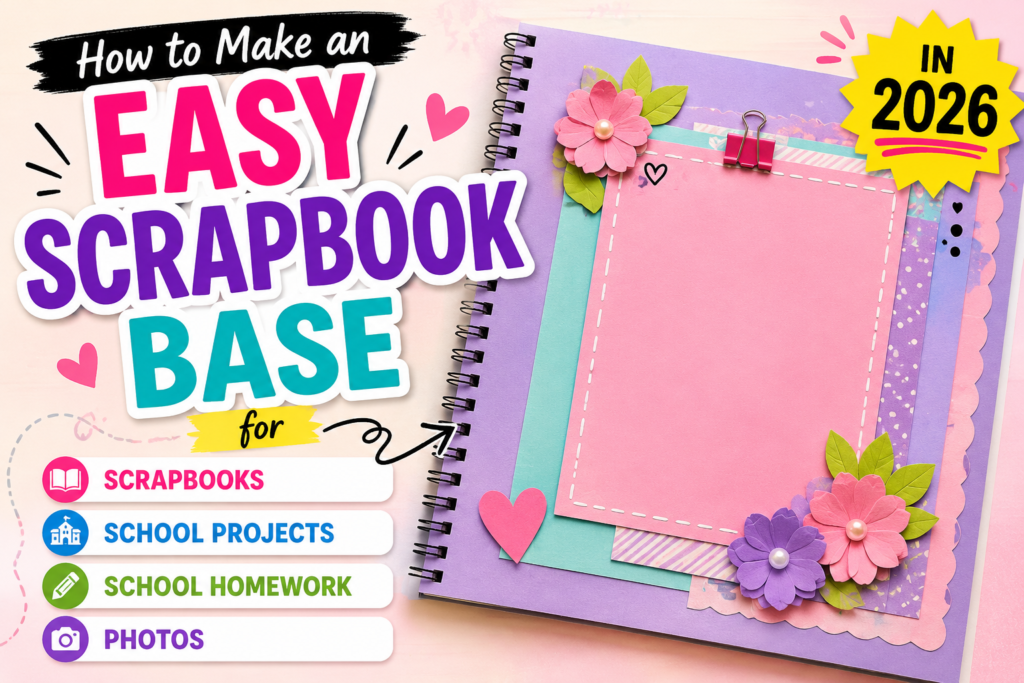
Making an easy scrapbook base in 2026 is simple, affordable, and perfect for school projects, homework assignments, or personal photo collections. Start with a sturdy foundation like chart paper, cardstock, cardboard, or an old notebook. Choose a size that suits your project A4 or A3 works best for school use. Cover the base with colored paper, wrapping paper, or patterned sheets to give it a clean background. You can also laminate or use transparent tape to make it more durable, especially if you plan to paste photos, drawings, or craft items on it. Adding a border with washi tape or colored strips instantly improves the look while keeping the design neat and organized.
Once your base is ready, plan sections before adding anything permanently. Lightly mark spaces for titles, photos, and decorations so the layout stays balanced and visually appealing. Use glue sticks for paper items and double-sided tape for photos to avoid wrinkles. You can enhance your scrapbook base with simple decorations like stickers, doodles, glitter lines, or printed labels for headings. Keeping the design minimal but structured helps make your scrapbook look professional while still being creative. This easy base can be reused for multiple themes, making it a flexible option for school presentations and creative assignments.
Why Scrapbooks Are More Popular Than Ever in 2026
In today’s digital world, scrapbooks continue to hold a special place in the hearts of students, parents, teachers, and craft enthusiasts. While smartphones and cloud storage make it easy to save thousands of photos, physical scrapbooks provide something that digital files cannot an emotional connection. A scrapbook allows people to touch, flip through, and experience memories in a more meaningful way. Whether it is a collection of family photos, a school project, or a creative homework assignment, scrapbooks help preserve important moments in a personalized format.
The popularity of scrapbooking has also increased because schools are encouraging more hands-on learning experiences. Teachers often assign creative projects that combine research, organization, and artistic presentation. A scrapbook offers students the opportunity to showcase information in a visually appealing and engaging way. Instead of writing a standard report, students can create pages filled with photographs, drawings, charts, and decorative elements that make learning more enjoyable.
The Return of Hands-On Creativity
As people spend more time using technology, many are rediscovering the joy of traditional crafts. Scrapbooking provides a relaxing activity that encourages creativity and self-expression. It allows individuals to take a break from screens and create something tangible with their own hands. This return to hands-on creativity is one of the biggest reasons scrapbooks remain popular in 2026.
Creating a scrapbook is much like telling a story. Every page represents a chapter filled with memories, ideas, and achievements. Unlike digital albums that can easily be forgotten, handmade scrapbooks become treasured keepsakes that can be enjoyed for years. They offer a unique combination of creativity, organization, and emotional value that continues to attract people of all ages.
What Is a Scrapbook Base?
A scrapbook base is the main structure that supports the entire scrapbook. It consists of the pages, cover, and binding that hold everything together. Before adding photos, decorations, and written content, you need a sturdy base that can support all these elements.
Think of a scrapbook base as the foundation of a house. Without a strong foundation, the house cannot stand properly. Similarly, a scrapbook requires a durable structure to ensure that pages remain secure and organized. A well-made scrapbook base helps prevent pages from tearing, bending, or falling apart over time.
Understanding the Foundation of a Scrapbook
The scrapbook base determines the size, shape, and overall layout of the project. Some scrapbook bases use simple folded cardstock pages, while others include ring binders, accordion folds, or stitched bindings. For beginners and school projects, a cardstock-based scrapbook is often the easiest and most practical option.
A strong scrapbook base provides flexibility for adding photos, stickers, drawings, and written information. It also ensures that pages turn smoothly and remain aligned. Taking the time to create a solid foundation makes the decorating process much easier and results in a more professional-looking scrapbook.
Materials You Need for an Easy Scrapbook Base

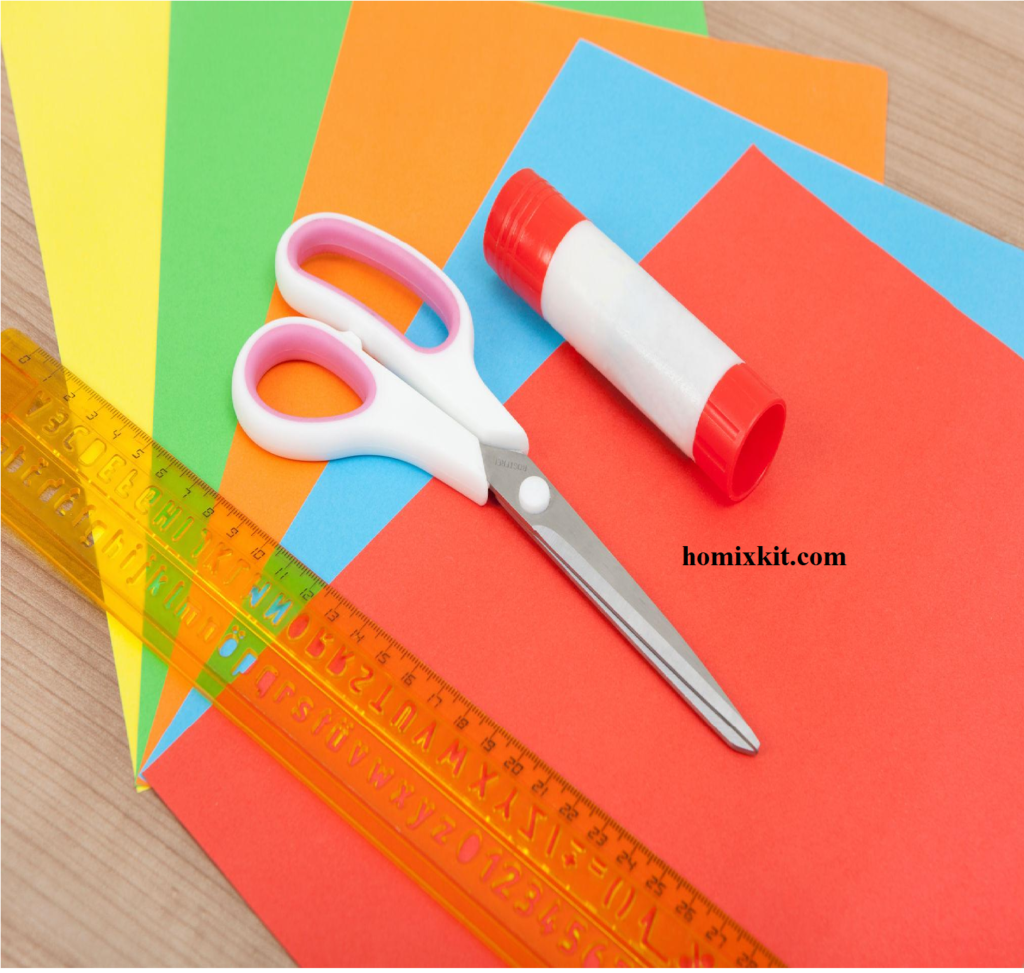
Before starting your scrapbook, gather all the necessary materials. Having everything ready beforehand helps make the process smoother and more enjoyable.
Essential Supplies
| Material | Purpose |
|---|---|
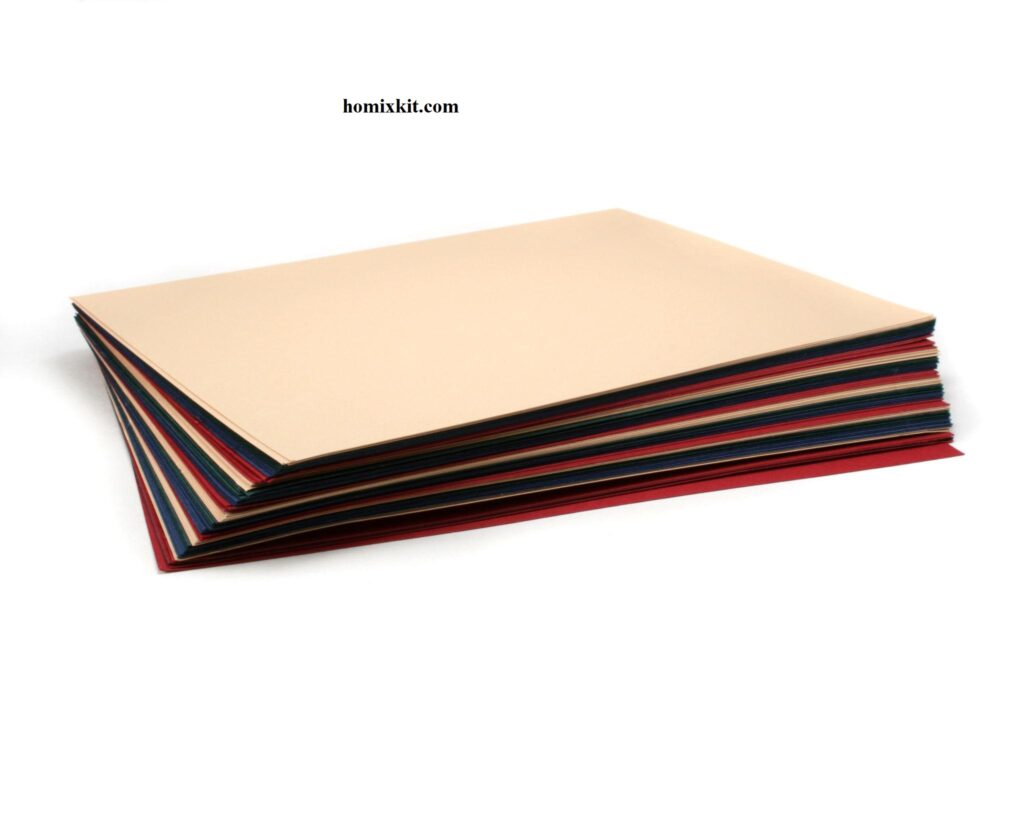
| Cardstock Paper | Main scrapbook pages |
| Thick Cardboard | Front and back covers |
| Glue Stick | Attaching pages |
| Double-Sided Tape | Strong page bonding |
| Scissors | Cutting paper |
| Pencil | Marking measurements |
| Ruler | Measuring and folding |
| Decorative Paper | Background designs |
| Photos | Personal memories and projects |
These basic supplies are affordable and available in most stationery and craft stores. Students can also use recycled materials to reduce costs while adding a unique touch to their projects.
Optional Decorative Materials
Decorative materials can make your scrapbook more attractive and personalized. Some popular options include:
- Washi tape
- Stickers
- Colored markers
- Glitter paper
- Ribbon
- Printed quotes
- Foam letters
- Decorative stamps
- Patterned scrapbook paper
These materials help enhance the visual appeal of your scrapbook. However, it is important to use decorations carefully so they complement the content rather than distract from it.
Choosing the Right Paper Size
The size of your scrapbook pages can affect both appearance and functionality. Choosing the right paper size depends on the purpose of your project and the amount of content you plan to include.
Larger pages provide more space for photos, diagrams, and written information. Smaller pages create compact scrapbooks that are easier to carry and store. The key is to choose a size that balances creativity and practicality.
Best Sizes for School Projects
For most school projects, A4 cardstock is an excellent choice. It provides plenty of space for research notes, images, and decorations while remaining easy to handle. Students can comfortably organize information without overcrowding the page.
A5 paper works well for smaller memory books and photo albums. For larger display projects, 12×12-inch scrapbook paper offers a professional appearance and plenty of room for creative layouts. Regardless of size, thicker cardstock is always recommended because it provides better durability than regular printer paper.
Step-by-Step Guide to Making a Scrapbook Base
Creating a scrapbook base is easier than many beginners think. By following a few simple steps, you can build a strong and attractive foundation for your scrapbook.
Step 1 – Prepare Your Cardstock Sheets
Start by selecting 6 to 10 sheets of cardstock paper. Make sure all sheets are the same size. Uniform page sizes help create a neat and professional appearance. Place the sheets on a flat surface and use a ruler to find the center line of each page.
Mark the center lightly with a pencil. These markings will guide your folds and help keep everything aligned. Taking a few extra minutes to measure accurately can make a significant difference in the final result.
Step 2 – Fold the Pages Correctly
Carefully fold each cardstock sheet along the center line. Press firmly along the fold to create a sharp crease. Consistent folds ensure that all pages fit together properly.
After folding, stack the pages together and check that the edges align evenly. If any pages appear uneven, adjust them before moving on. Proper folding is essential because it affects how smoothly the scrapbook opens and closes.
Step 3 – Create the Spine
The spine is the section that connects all the pages together. Cut a strip of sturdy cardstock approximately two to three inches wide. Fold the strip into several equal sections, creating an accordion-style structure.
Each fold in the accordion spine will hold one folded page section. This method is popular because it is simple, durable, and beginner-friendly. The accordion spine also provides extra room for photos and decorations.
Step 4 – Attach All Pages Together
Apply glue or double-sided tape to each section of the spine. Carefully attach one folded page to each spine panel. Press firmly to ensure a strong bond.
Continue attaching pages until the scrapbook reaches the desired thickness. Once all pages are attached, allow the adhesive to dry completely. Test each page by opening and closing it gently to ensure the structure remains secure.
Step 5 – Design the Front and Back Covers
The covers protect the scrapbook and create a strong first impression. Cut two pieces of thick cardboard or heavy cardstock slightly larger than the inner pages. Attach them securely to the front and back of the spine.
Decorate the covers according to your chosen theme. You might include a title, photographs, drawings, stickers, or decorative paper. Personalized covers help make the scrapbook unique and visually appealing.
Easy Scrapbook Base Ideas for School Homework
School projects become much more engaging when presented in scrapbook format. Scrapbooks allow students to combine information, creativity, and visual presentation in a single project.
Science Projects
Science scrapbooks are excellent for documenting experiments, research findings, and observations. Students can dedicate separate pages to different sections of the scientific process. Photographs, diagrams, and charts can be added to help explain complex concepts.
Interactive elements such as fold-out charts and hidden information cards make science projects more engaging. These creative features can help students present information clearly while demonstrating effort and originality.
History Assignments
History projects work particularly well in scrapbook format because they focus on storytelling. Students can create timelines, include historical photographs, and add maps or illustrations related to important events.
Decorative elements that match the historical period can make the project even more immersive. A scrapbook transforms history from a list of dates into a visual journey that helps both students and teachers better understand the subject matter.
Creative Ways to Add Photos
Photographs are often the centerpiece of a scrapbook. Rather than simply gluing photos directly onto pages, creative presentation techniques can make them more visually interesting.
Photo Frames and Flip Cards
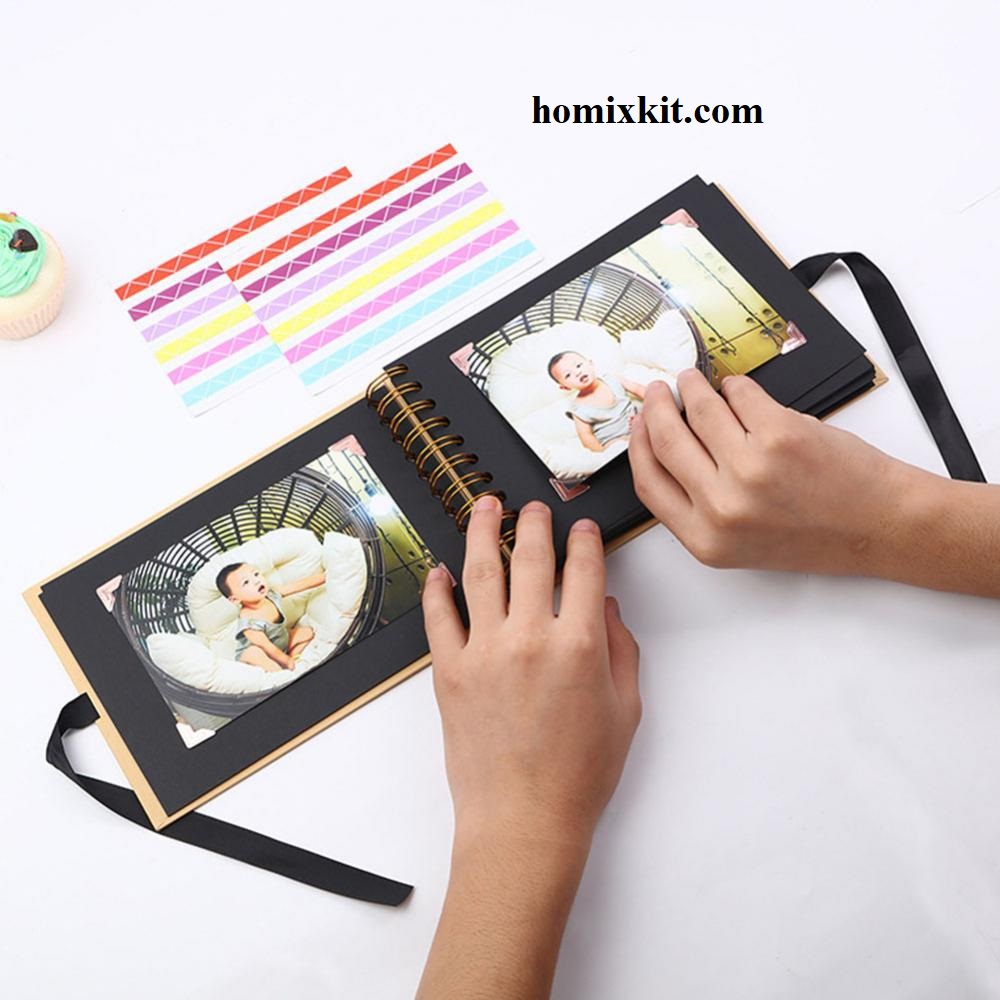
Photo frames are a simple way to make pictures stand out. Colored cardstock can be used to create borders that draw attention to important images. Layering different colors and textures adds depth to the page.
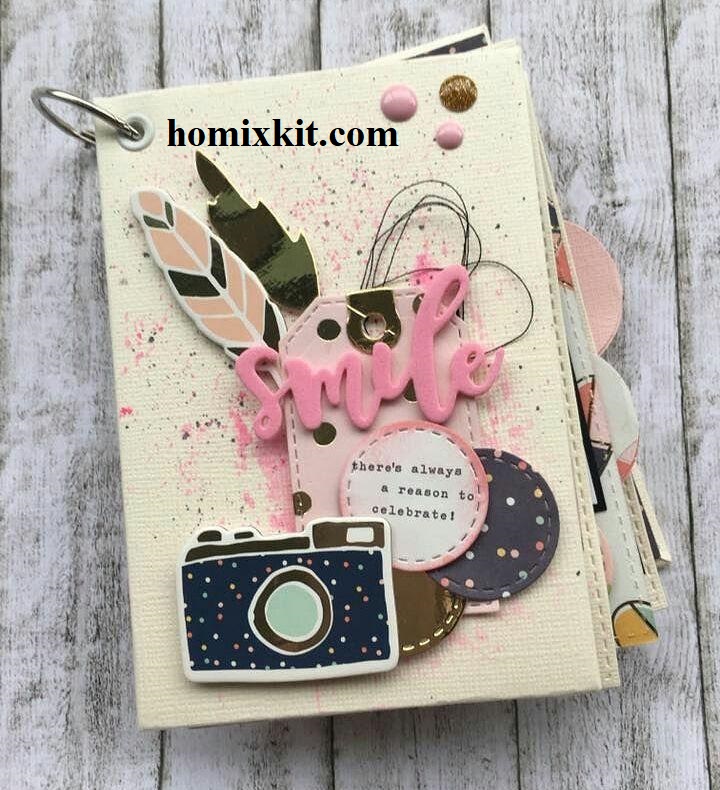
Flip cards are another popular option. These interactive elements allow multiple photos or pieces of information to be displayed in the same space. When readers lift the flap, they discover additional content hidden underneath. This technique adds excitement and keeps pages organized.
Photo pockets, mini envelopes, and pull-out tags can also be used to display photographs while maintaining a clean layout. These creative features make the scrapbook more interactive and enjoyable to explore.
Decorating Your Scrapbook Like a Pro
Decorating is one of the most enjoyable parts of scrapbooking. The goal is to enhance the content while maintaining a balanced and attractive design.
Trending Scrapbook Styles in 2026
One of the biggest scrapbook trends in 2026 is the use of natural color palettes. Soft greens, warm beige tones, dusty pinks, and earthy browns create a modern and elegant appearance. These colors help photos remain the focal point while adding warmth to the overall design.
Layering is another popular technique. Instead of placing decorations randomly, scrapbookers arrange papers, stickers, and embellishments in overlapping layers to create depth. Handwritten notes, botanical illustrations, and textured papers are also frequently used to add personality.
Interactive scrapbook elements continue to grow in popularity. Pop-up sections, hidden pockets, mini booklets, and pull-out cards transform a simple scrapbook into an engaging experience. These features are especially useful for school projects because they demonstrate creativity and attention to detail.
Common Mistakes to Avoid
One of the most common mistakes beginners make is rushing through the planning stage. Without a clear layout plan, pages can become cluttered and difficult to organize. Taking time to sketch ideas beforehand can help create a more cohesive design.
Another mistake is using weak adhesives. Photos and decorations may fall off if low-quality glue is used. Investing in reliable adhesive products ensures that the scrapbook remains intact for years.
Overcrowding pages with decorations is another common problem. While embellishments can enhance a scrapbook, too many decorations may distract from the main content. Leave some open space so important photos and information can stand out.
Finally, many beginners underestimate the importance of a strong spine. A weak spine can cause pages to separate over time. Building a sturdy foundation from the beginning helps prevent structural issues later.
Benefits of Making Your Own Scrapbook Base
Creating your own scrapbook base offers several advantages. First, it allows complete customization. You can choose the size, shape, color scheme, and layout that best suit your project. Unlike store-bought albums, a handmade scrapbook can be tailored specifically to your needs.
Making a scrapbook also develops valuable skills such as creativity, planning, organization, and problem-solving. Students learn how to present information effectively while expressing their artistic abilities. These skills are useful both inside and outside the classroom.
Another major benefit is cost savings. Homemade scrapbook bases are often much cheaper than purchasing pre-made albums. By using affordable or recycled materials, you can create a beautiful scrapbook without spending a lot of money.
Most importantly, scrapbooks preserve memories in a meaningful and personal way. Years later, a handmade scrapbook can still bring joy and nostalgia, making it a treasured keepsake for generations.
Conclusion
Making an easy scrapbook base in 2026 is a simple and rewarding project suitable for students, hobbyists, and families alike. With a few basic materials such as cardstock, glue, scissors, and creativity, anyone can build a sturdy scrapbook foundation for school projects, homework assignments, photographs, and memory keeping. The process is affordable, customizable, and enjoyable, making it an excellent activity for both educational and personal purposes.
A strong scrapbook base provides the structure needed to showcase photos, research, artwork, and decorations effectively. Whether you are creating a science project, documenting a family vacation, or preserving special memories, a well-designed scrapbook transforms ordinary content into a meaningful visual story. By following the steps outlined in this guide, you can confidently create a scrapbook that is both beautiful and durable.
FAQs
1. What is the easiest scrapbook base for beginners?
The accordion spine scrapbook base is often considered the easiest because it requires minimal tools and provides strong support for multiple pages.
2. What paper should I use for a scrapbook base?
Cardstock paper between 180 GSM and 250 GSM is recommended because it is thick, durable, and capable of supporting decorations and photographs.
3. Can I make a scrapbook using recycled materials?
Yes. Recycled cardboard, old magazines, wrapping paper, greeting cards, and leftover craft materials can all be used to create a unique scrapbook.
4. How many pages should a school scrapbook contain?
Most school scrapbook projects contain between 8 and 20 pages, depending on the assignment requirements and the amount of information being presented.
5. How can I make my scrapbook look professional?
Use a consistent color scheme, balanced layouts, neat handwriting, quality adhesives, and avoid overcrowding pages with too many decorations.
Pingback: How to Make a Scrapbook Tutorial Page with Flower Frame Guide 2026